Saturday, March 29, 2014

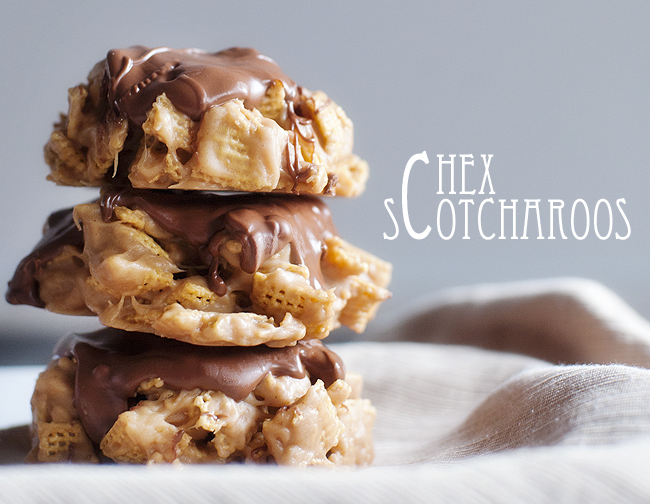
Chex Scotcharoos

These were amazing!  I enjoyed making them into the free standing cookie style instead of the typical cookie bar style.  They were so soft and delicious!  My frosting got a bit clumpy so i would probably leave the peanut butter out next time to see if it helped.  I added some butter to smooth it out.  I also doubled the chex/corn syrup/sugar mixture and kept the frosting portions the same.  It was plenty of frosting.

Chex Schotcharoos
Recipe from prettyplainjanes.com
  • 6 cups Chex cereal
  • 1 cup light corn syrup
  • 1 cup sugar
  • 1 1/2 cups peanut butter
  • 2 cups semi sweet chocolate chips
  • 2 cups butterscotch chips
  • 1/2 cup peanut butter
  • 1 teaspoon vanilla
  1. Butter a large bowl, and measure out 6 cups of Chex cereal. Set aside. Butter a 9x13 dish, OR line a baking sheet with wax paper if you would like freeform scotcharoo's like the ones I made that are pictured.
  1. In a small saucepan, combine the corn syrup and sugar over medium heat. Once boiling, immediately remove from heat and stir in 1 1/2 cups of peanut butter. Pour over cereal and fold together. Pour cereal into the 9x13 dish, or use a large cookie scoop to drop cereal onto wax paper, and use your hands to press together and form them.
  1. Using a microwave safe dish or a double boiler, melt together chocolate chips, butterscotch chips, 1/2 cup of peanut butter and vanilla. If microwaving, heat in 10 second intervals, stirring in between to prevent the chocolate from burning.
  1. Once smooth, pour over cereal, or scoop onto the piles you have created.
  1. Allow to cool completely at room temperature.

Monday, March 24, 2014

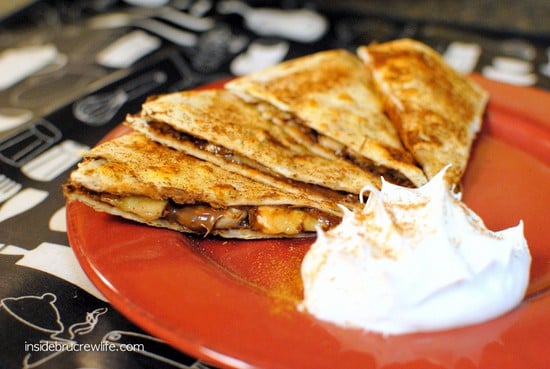
Banana Nutella Quesadilla


Banana Nutella Quesadillas
We had these for our FHE treat tonight and there were delicious!  Plus, the kids could help with the dessert.  I had two kids slice bananas while another spread the nutella.  To make it a little more calorie friendly I just used cooking spray instead of butter, even to put the cinnamon on it.  Yum, yum!

Banana Nutella Quesadillas
Recipe from insidebrucrewlife.com
Ingredients
4 flour tortillas
1 Tablespoon butter
2 Tablespoons cinnamon sugar
1/4 cup Nutella
2 ripe bananas
Instructions
  1. Spread butter on one side of each of the tortillas and sprinkle with cinnamon sugar. Place the butter side down on a warm skillet and heat until golden brown.
  2. Spread the non butter side with Nutella. Top with banana slices. Place another warm tortilla shell, cinnamon side up, on top. Makes 2 full quesadillas. Cut each quesadilla into 8 wedges. Serve with Cool Whip if desired. Serves 4.

Balsamic Chicken Salad with Tortellini


We had this for dinner tonight and it was super yummy-licious.  I did some swapping out.  I did not add the yellow peppers and instead added cut up mozzarella string cheese.  It made it more of a bruschetta dish.  It was really good!

Balsamic Chicken Salad with Tortellini
Recipe from fastsaladrecipes.com
Ingredients:2 – 8.8 oz pkgs Cheese Tortellini
1 lb chicken cutlets, cooked and diced
1 1/2 cups Balsamic Vinaigrette
1 tsp Dijon mustard
Freshly ground pepper, to taste
2 cups firmly packed fresh spinach,
chopped
1/4 cup fresh basil, chiffonade
1 1/2 cups cherry tomatoes, halved
1/2 cup yellow pepper, sliced
Place chicken in a zip-lock bag and pour 1 cup
balsamic vinaigrette in bag with chicken. Marinate
for at least two hours, but best if marinated over night.
In a grill pan, grill chicken breasts about 5-6 min
utes per side until cooked through. Place yellow
pepper slices in grill pan and grill about 2 minutes
on each side.
Whisk together 1/2 cup balsamic vinaigrette and
Dijon mustard in a small bowl.
Cook tortellini according to package directions;
drain. Spread pasta in a single layer on a baking
sheet. Drizzle with 1/2 tbsp olive oil. Let cool for
10 minutes.
Toss together tortellini, chicken pieces,
balsamic/mustard mixture, spinach and remaining
ingredients in a large bowl.
Serve immediately, or if desired, cover and chill for
1 hour before serving.


Monday, March 17, 2014

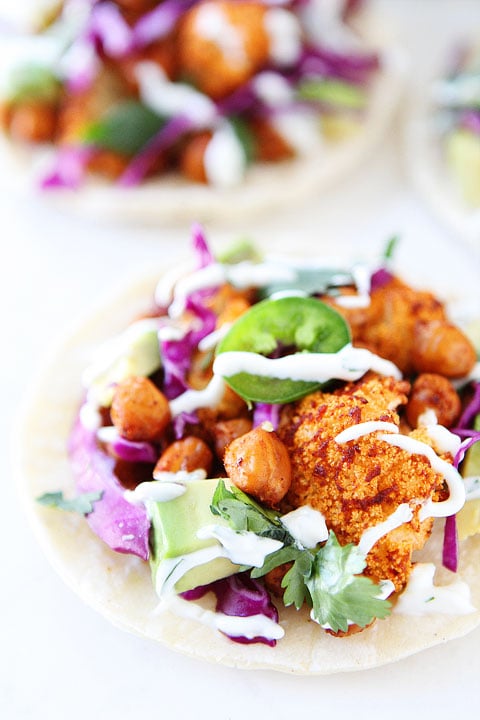
Roasted Cauliflower and Chickpea Tacos

Oh my heavens! We had vegan gluten free friends coming for dinner and I wanted to make something to accommodate their diet. I found these tacos on twopeasandtheirpod.com and decided to try them out. Forget vegan gluten free these tacos were AMAZING! they were super simple to throw together as far as prep and I seriously ate 5 they were so good. Don't be scared just make them you wont regret it!


Roasted Cauliflower and Chickpea Tacos

Yield: Serves 4
Prep Time: 10 minutes
Cook Time: 35 minutes
Total Time: 45 minutes
My favorite tacos! Roasted Cauliflower and Chickpea Tacos are easy to make and so delicious! Healthy has never tasted so good!

ingredients:

For the Tacos:
2 teaspoons chili powder
1 teaspoon ground cumin
1/4 teaspoon garlic powder
1/4 teaspoon onion powder
1 teaspoon sea salt
1 tablespoon fresh lime juice
1 tablespoon olive oil
1 tablespoon water
1 (15 oz.) can of chickpeas, drained and rinsed
1 small head cauliflower, washed and cut into bite-size florets
Corn tortillas
1 cup finely chopped red cabbage
1 jalapeño, sliced, seeds removed
1 large avocado, seed removed and diced
Chopped cilantro
For the Lime Crema:
1 cup plain Greek yogurt or sour cream
1/8 cup fresh lime juice
1/4 cup chopped cilantro
Salt and pepper, to taste

directions:


1. Preheat oven to 400 degrees. In a medium bowl, whisk together chili powder, garlic powder, onion powder, cumin, salt, lime juice, olive oil, and water. Stir in chickpeas and cauliflower florets. Place seasoned chickpeas and cauliflower on a greased baking sheet. Roast for 30-35 minutes, stirring occasionally during cooking, until chickpeas are slightly crispy and cauliflower is tender. Remove from oven and set aside.
2. To make the lime crema, place the Greek yogurt or sour cream in a small bowl. Add fresh lime juice and cilantro. Stir well. Season with salt and pepper, to taste.
3. Take a corn tortilla and place roasted cauliflower and chickpeas on top. Top with red cabbage, jalapeño slices, avocado, and cilantro. Drizzle lime crema over the tacos and serve!
Note-you can make the tacos vegan by using vegan sour cream or yogurt to make the lime crema or you can omit it...but it's really good:)

Sunday, March 9, 2014

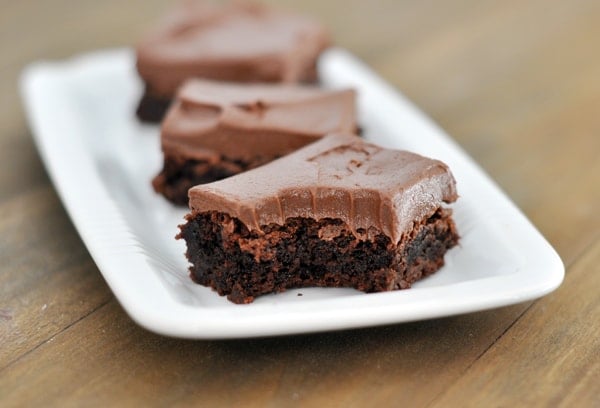
Chocolate Frosted Brownies


I made these a few weeks ago when I was craving a BYU brownie. These were fabulous via mels kitchen cafe. The only thing I would change is a little less butter in the frosting and more powdered sugar to make it a bit more fluffy. Also Maybe a tad less salt in the frosting and brownie itself. Regardless, these were heaven and the company was in love as well!

Chocolate Frosted Brownies
YIELD: MAKES 12-16 BROWNIES
Note: This recipe can be doubled for a 9X13-inch pan. Bake for about 5 minutes less than the recipe states below and increase as needed while you check for doneness (cause there's nothing worse than an overcooked brownie).
INGREDIENTS
    For the Brownies:
  • 1/2 cup butter
  • 3 ounces unsweetened chocolate chopped (about 1/2 cup)- I just used semisweet chocolate chips
  • 1/2 cup granulated sugar
  • 1/2 cup light brown sugar
  • 2 large eggs
  • 1 teaspoon vanilla extract
  • 1/2 cup semisweet chocolate chips
  • 3/4 cup all-purpose flour
  • 1 teaspoon baking powder
  • 1/4 teaspoon salt
  • For the Frosting:
  • 6 tablespoons butter, at room temperature
  • 1/4 cup unsweetened cocoa powder
  • 1/8 teaspoon salt
  • 1 1/4 cups powdered sugar
  • 1/2 teaspoon vanilla extract
  • 3-5 tablespoon milk or cream
DIRECTIONS
  1. Preheat the oven to 350 degrees F. Line an 8-inch-square baking dish with foil, letting the excess hang over the edges (this helps to make "handles" for lifting out the brownies after they have cooled). Lightly grease the foil; set aside.
  2. In a medium-size microwave-safe bowl, combine the chocolate and butter for the brownies. Microwave for 1-minute increments at 50% power, stirring in between, until the chocolate and butter are melted and smooth. Whisk in the granulated and brown sugars. Whisk in the eggs and the vanilla extract. Add the flour, baking powder and salt. Fold the dry ingredients into the chocolate mixture with a rubber spatula until combined. Stir in the chocolate chips.
  3. Pour the batter into the prepared pan and bake for 25-30 minutes, until a thin knife or toothpick inserted in the center comes out clean or with a few moist crumbs. Remove the brownies from the oven and allow them to cool completely.
  4. For the frosting, using an electric mixer (handheld or stand mixer), cream together the butter, cocoa powder, and salt on medium speed for about 2-3 minutes. Scrape down the sides of the bowl and add the powdered sugar. Mix on low speed to incorporate the sugar. Add the vanilla and milk, starting with a couple tablespoons and adding more as needed to adjust the consistency. Increase the mixer speed to medium-high, beating until smooth and fluffy.
  5. Spread the frosting onto the cooled brownies. Store the brownies in an airtight container, or tightly wrapped, at room temperature or in the refrigerator (I highly, highly, highly prefer my brownies chilled in case you care) for 3-5 days.

Yellow Pepper Pasta


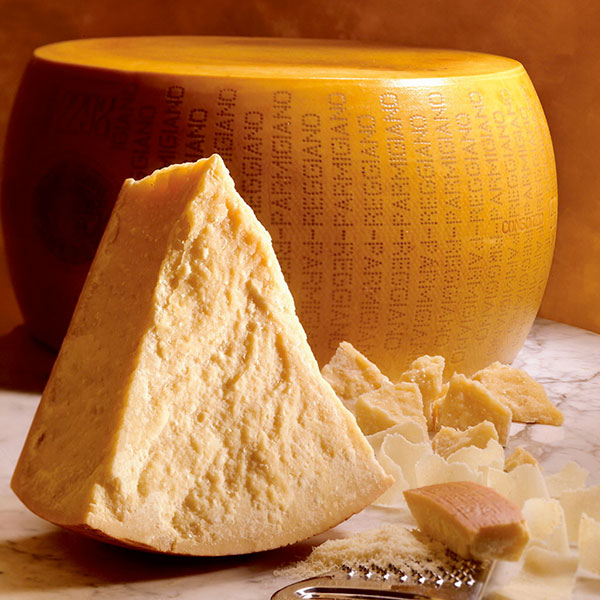
This pasta is addictingly good. I could seriously pick at it all day and never get sick of it. It is a recipe my brother brought back from his mission in Milan and made for us all the time. It is super easy and the perfect recipe to double and make for large groups, showers etc. The key ingredient really is the Parmesan reggiano so don't cheat! find the yellow peppers on sale to justify the cost but don't make it without it!

Yellow Pepper pasta
1 and 1/2  16 oz. boxes of butterfly pasta (farfalle) (roughly 24 oz)
1 medium yellow onions cut to small bits and
3 yellow peppers into 1/2 inch squares
pour about 3/4 cups of high quality olive oil in a large fry pan. 
Put in 3 cubes of chicken boullion. 
Pour in onions and peppers,
cook until just barely soft, not mushy.
Pour out some of olive oil, but not all and mix in cooked pasta
1 1/2-2 cups of Parmesan Reggianno grated onto pasta and mix in. Can be served warm or cold. I prefer warm. Make sure the Parmesan is Reggianno, not regular, That gives it a good flavor even though it's a bit pricey. Costco is obviously the best value but you get a ton so don't do that unless you're doubling it.


Saturday, March 8, 2014

Rocky Road Brownies

This makes a great gift that was recently given to me by a friend as a mix-in-a-jar.  And they were hands-down the best brownies I've ever eaten.  I mean, c'mon, they're made with buttermilk.  How can you go wrong?  Move over, Ghiradelli Brownie mix, I found my new favorite.


Rocky Road Brownies
recipe from Deer Lake Cookie Recipes 

If giving as a gift, add these dry ingredients to a tall Mason jar in this order (bottom to top):

1/2 cups all-purpose flour
1 cup semisweet chocolate chips
1 cup granulated sugar
1 cup miniature marshmallows
1/2 cup unsweetened dark cocoa powder
3/4 cup coarsely chopped walnuts
Recipe Note: put the marshmallows in a resealable plastic food storage bag; seal bag. Use marshmallows as the final layer in jar.

Wet Ingredients (include a note with your jar to add these ingredients):

1/2 cup butter
1 egg (lightly whipped with a fork in a small bowl)
1/4 cup buttermilk
1 tsp. vanilla

Preheat your oven to 355 degrees. Lightly grease 8X8-inch baking pan.  Remove marshmallows from plastic food storage bag in jar; set aside.

In a large bowl, add in Rocky Road dry mix from jar. Next, add in egg, buttermilk, melted butter and vanilla; stir until blended.
Spread batter evenly into your prepared pan. Bake 25 to 32 minutes or till it sets up. While hot; sprinkle miniature marshmallows over brownies. Now bake for an additional 3 to 5 minutes or until marshmallows are puffed and slightly melted. (Watch those rocky road brownies close, nobody likes burnt brownies.) Cool completely in pan on wire rack. Cut into squares.